We’ll walk you through submitting your shipping instructions (SI) on the Maersk.com portal.
Step 1: Log in to Maersk
Log in to your account on Maersk.com. Once you're logged in, you'll see the hub. From here, you can access various tools and features.
Step 2: Toggle to the Task feature
One of the easiest ways to submit your shipping instructions is by using the "Task" feature. This feature shows you any tasks due within a specific timeframe, such as the next seven days.
If you have tasks due, you can filter them by task type or due date. You can further filter by ‘Submit Shipping Instructions’ under the task type. Now, simply click on the instruction you need to complete, and it will take you to the Shipping Instructions submit page.
Step 3: Get an overview through Shipment Details
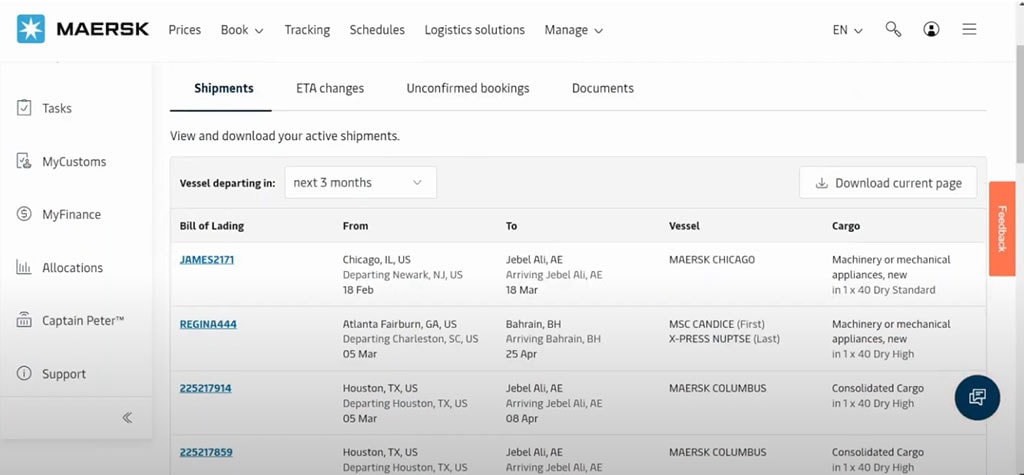
Another way to submit your shipping instructions is through the shipment binder. When you click on any BoL in the export overview tab (under the ‘Manage’ menu), it takes you to the shipment binder. You also get the option to filter shipments by date or type.
The shipment details contain all the information and documentation related to that shipment. Scroll down to the ‘Submit Shipping Instructions’ button under the “tasks” feature. It’ll take you to the instructions page.

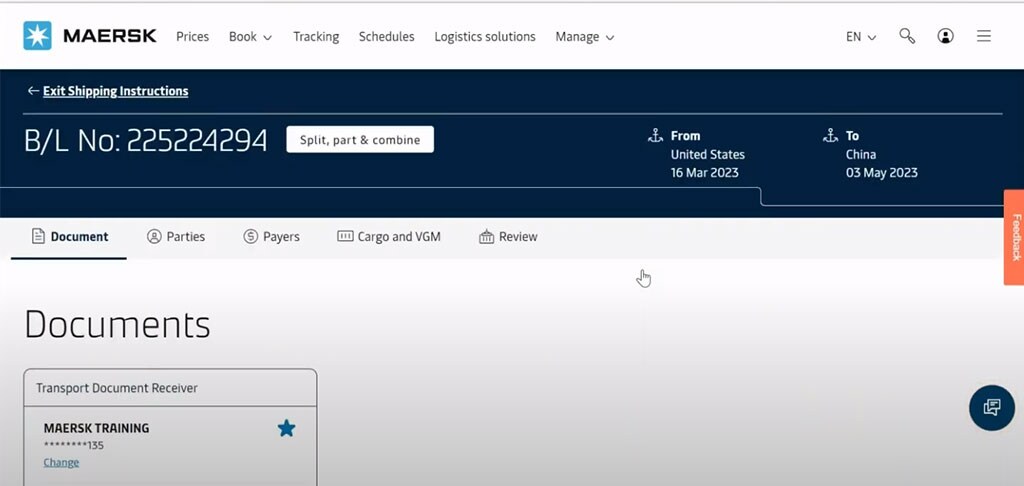
Step 4: Fill in your shipping instructions
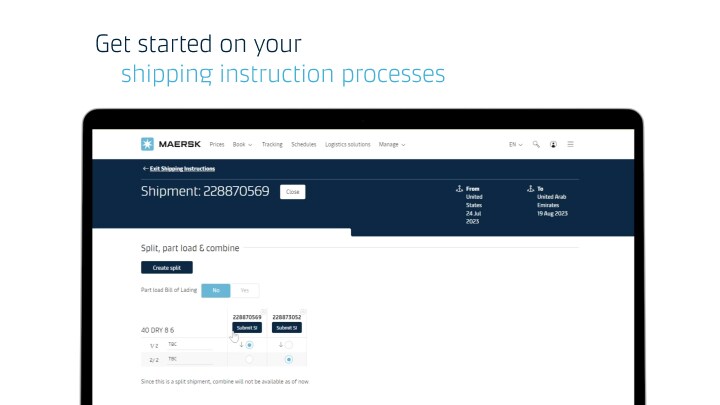
On the SI portal, you will see various tabs related to different parts of your instructions. Right next to the B/L no., you get the option to split, part, or combine your BoLs.
Next, you can work on five different tabs:
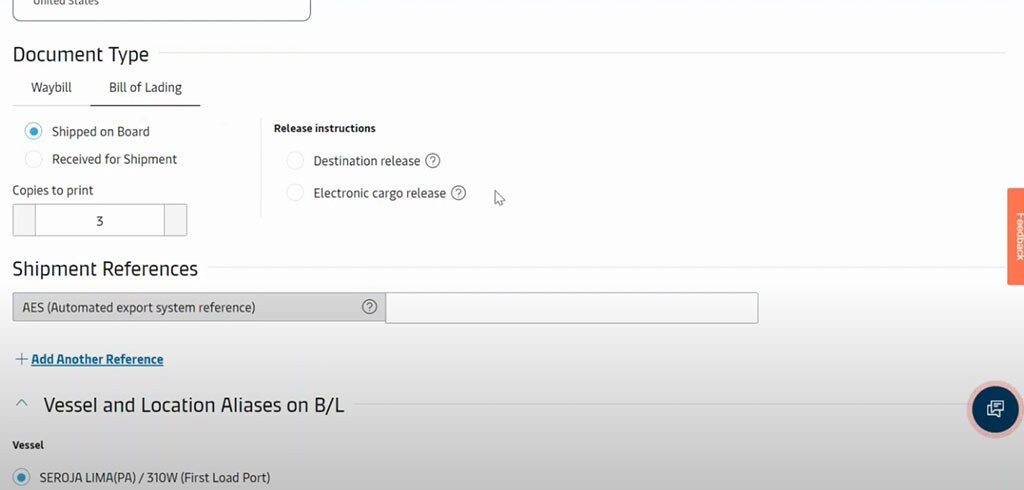
1. Document
- Under this tab, you can choose your document type (Bill of Lading or Waybill) along with release instructions.
- Another important feature here is Vessel & Location Aliases. It helps you input any specific location you want to be displayed on the documents.
- Next, you can request any additional items to be added to BoL, such as transit time, free days, or specific certificates. Save & Continue.
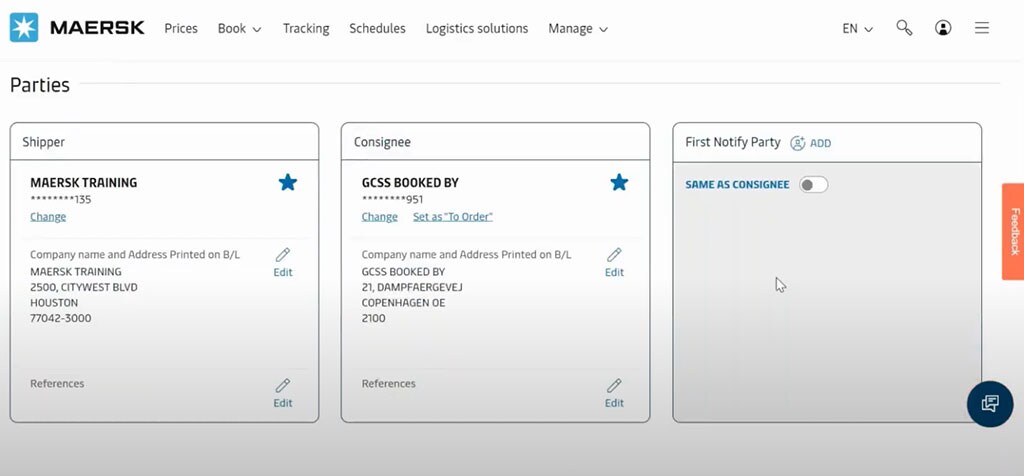
2. Parties
- Under this tab, you can see all the parties related to your shipment. Besides Shipper and Consignee, you can also add new parties (like forwarders) or references.
- We also give you the option to select a ‘First Notify’ party from here.
- For each party, you can edit how you want the address to be displayed on the documents. Save & Continue.
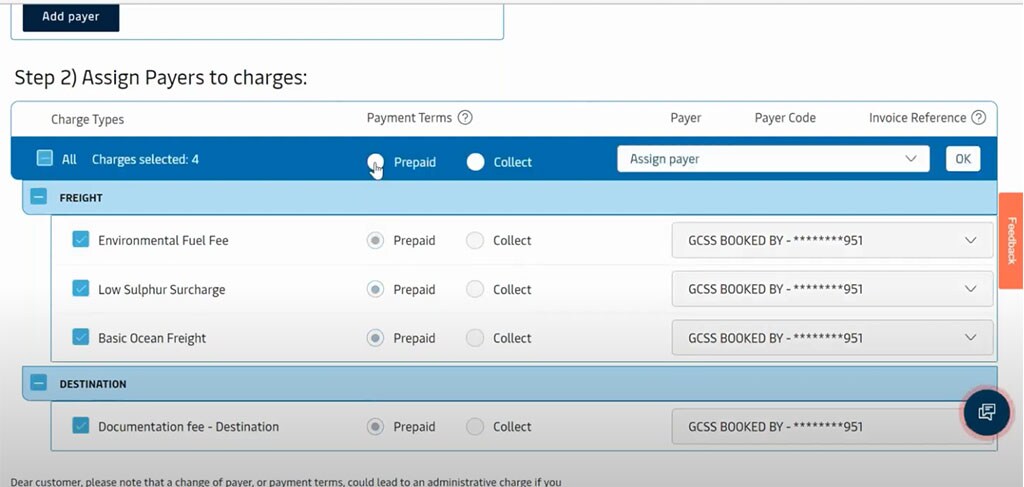
3. Payers
- Here you can add or remove payers and assign specific charges to certain payers at various stages.
- The charges will either be under ‘prepaid’ or ‘collect’ toggle.
- You can also choose whether you want these charges displayed on paper. Save & Continue.
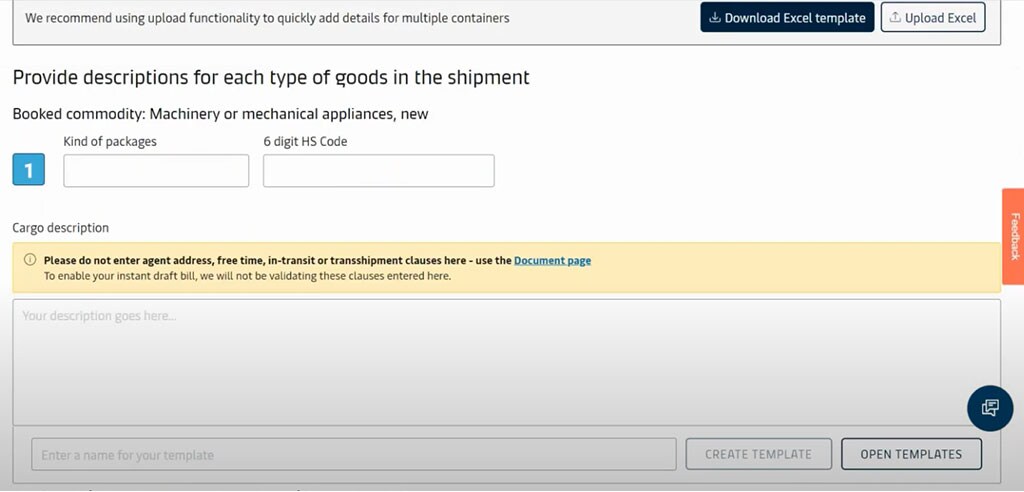
4. Cargo & VGM
- In this step, you add cargo details and related instructions. If you need to upload details of multiple packages, we allow you to upload Excel files too.
- Begin by providing descriptions for each type of goods in your shipment, along with their respective HS code.
- Next, you can assign multiple descriptions to one container or leave it at one each. The system will have pre-validated container numbers based on how many containers you've selected.
- Add package weight and volume details using the Verified Gross Mass (VGM) method of your choice.
- Finally, check for seals and references based on the country regulations where you're shipping.
- Once you've reviewed the cargo details again, save and continue to the final review.
5. Review
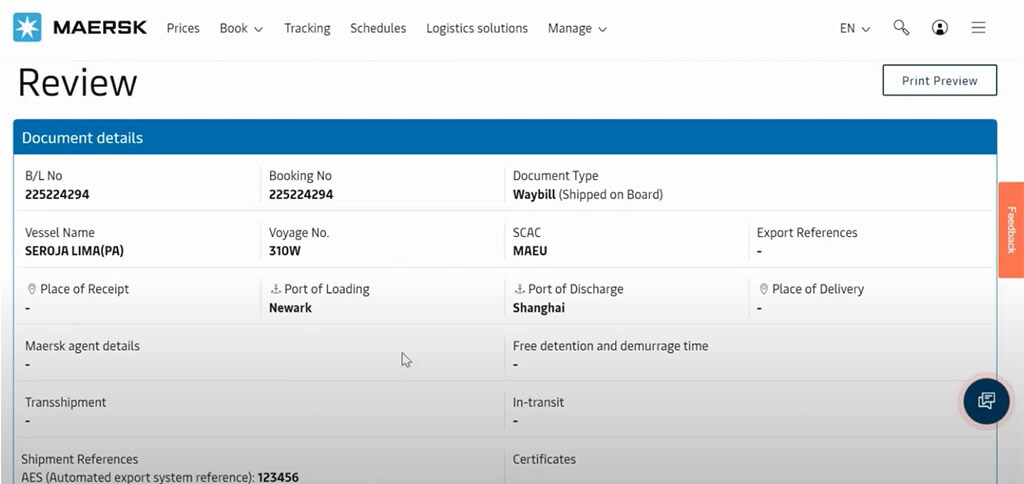
- In the review tab, you'll see an overview of all the instructions you've filled under different segments.
- You can choose to make any edits as required.
- Click submit if everything looks good! At the end of the review, you can also send the Verify Copy to additional email IDs.
Once we receive instructions, our team will review them. If everything is okay, you will receive a notification when your documentation is ready. In some cases, the verified copy is instantly issued. Submitting shipping instructions is that easy!
But what if you need to make any last-minute changes? After all, contingencies occur in shipping all the time. So let's learn…
